Monday, July 12, 2021

Clarks Mill

Maheno Valley Mills (Clarks Mill) 1880s. Culture Waitaki Online Collection

Clarks Flour Mill is located on State Highway One between Maheno and Reidston. I've driven past this place countless times but it wasn't until last week I decided to stop by and have a look around.

Clarks Mill. Date unknown. Hocken Library.

Wheat growing and flour milling was once a very important part of the North Otago economy. One of 13 flour mills in the district, the original mill was built 1866 to a Scottish design using locally sourced limestone. The mill was connected to the Main South Line with a siding in 1877.

Originally water was drawn from Mill Stream and diverted through a water race which drove a water wheel. The water wheel powered the British machinery and French millstones to produce the flour.

A display of Snow Wreath Flour at the Clarks Milling Stand at the Oamaru Expo. Unknown Date. Hocken Library.

From 1877 when the mill was connected the Main South Line a lot of traffic was generated from the mill which received local grain and dispatched flour. The mill was served by a siding that left the main line between the current State Highway One railway crossing and the Mill Creek railway bridge.

Signalling and Interlocking Arrangement Diagram for Maheno and Clarks Mill Siding. New Zealand Archives Dunedin Office.

I'm not sure how the siding was operated and whether New Zealand Railways locomotives worked the entire siding but for many years the siding was worked by a New Zealand Army surplus Bren Gun Carrier purchased by the mill after the second world war.


The Bren Gun Carrier at Clarks Mill. 1946. Culture Waitaki Online Collection.

My understanding is that the Bren gun carrier shunted the sidings and left wagons or picked up wagons on the siding directly beside the mainline and that NZR locomotives didn't actually fully work the sidings.

Clarks Mill outlasted most of the other flour mills in North Otago and closed in 1976.

So what's left at the Clarks Mill site today?

First I stopped at the railway level crossing on State Highway One just north of Maheno. The level crossing is just to the south of where the siding for the mill left the Main South Line. I remember reading somewhere that this level crossing is the only remaining level crossing on State Highway One that has no barrier arms but I'm not sure how accurate this is.

The State Highway One railway level crossing looking south towards Maheno. 09/07/21.

Looking north from the level crossing you can see a raised area to the right of the mainline where the siding started and where the siding descended on a right hand curve down towards the mill.

Site of the points off the main line leading to the mill siding. The siding split off the mainline and curved to the right towards the mill which can be seen in the middle right. Photo taken from the State Highway One level crossing. 09/07/21.

The entrance to the mill is well signposted and is on the right hand side of State Highway One as you head north from the level crossing.

Entrance to Clarks Mill off State Highway One.

The mill is looked after by Pouhere Taonga Heritage New Zealand and is a nationally recognised historic site. On my visit the mill was closed but you can still drive into the site and explore from the outside.

Leaving State Highway One the gravel road goes beneath the well known Mill Stream Bridge number 167.

Mill Stream Bridge. 09/07/21.

Bridge 167 Mill Stream Bridge Kiwirail Information Sign.

The first building you come to is the old weighbridge and cabin. The weighbridge consists of the weighbridge itself with a small timber and corrugated iron lean to cabin directly to the north. Unfortunately the cabin was locked so I wasn't able to get a good picture of the interior.

Clarks Mill weighbridge and cabin facing east. 09/07/21.

Clarks Mill weighbridge and cabin facing west with the Mill Stream railway bridge in the background. 09/07/21.

The rear of the Clarks Mill weighbridge and cabin facing east. 09/07/21.

Clarks Mill weighbridge facing west. You can see the old track alignment heading straight before curving up to the left towards the main line. 09/07/21.

Clarks Mill weighbridge facing east showing the old track alignment towards the mill. 09/07/21.

After having a good look around the weighbridge I made my way over to main mill area.

The mill area consists of three main buildings. A large corrugated iron store, the main milling building and a workers residence. 

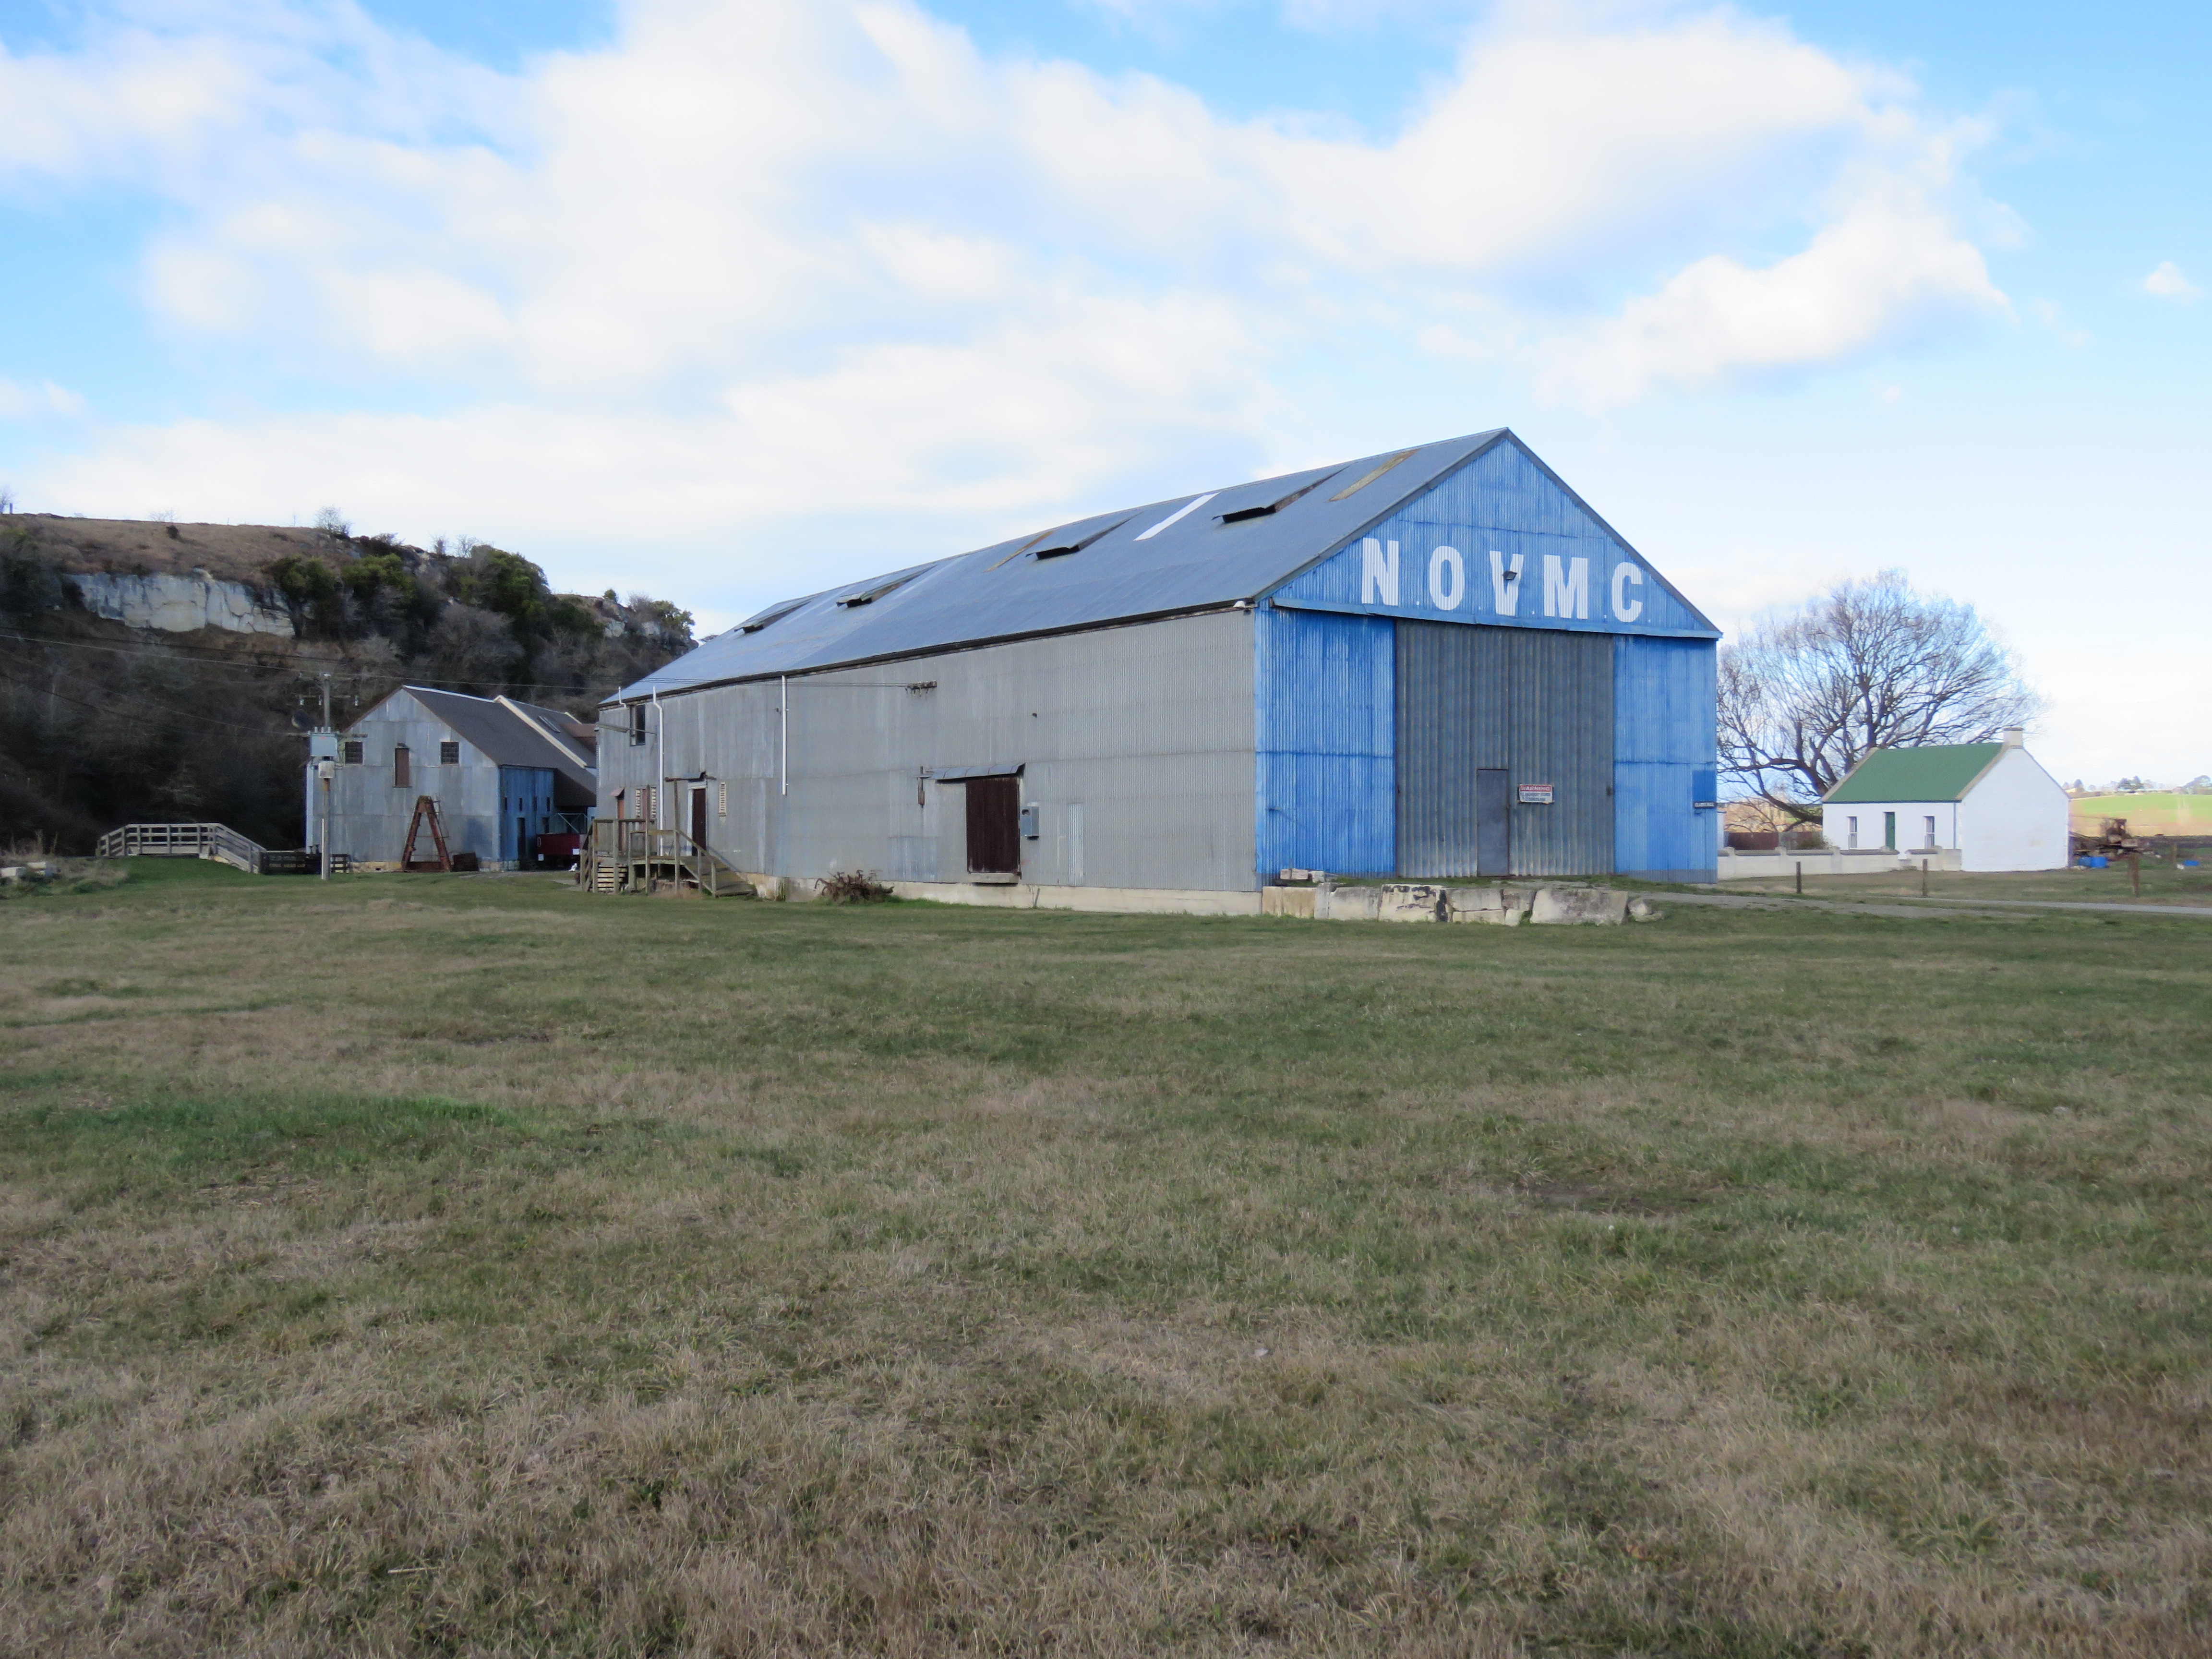
The first one I had a look around was the large flour store. The store is now used by the North Otago Vintage Machinery Club. 

Clarks Mill Flour Store north side. 09/07/21.

Clarks Mill Flour Store north side. 09/07/21.

I don't know why but I'm always fascinated by large industrial buildings like this and this one has it all. Its a large corrugated iron store with a railway siding on the north side. Looking at the aerial photo near the top of this post shows a large store to the north of the railway siding. I'm not sure if the current building was the old one that was moved to the current position or if the old building was demolished and this one built to the south of the siding.

Detail shot of the Clarks Mill Flour Store north side. 09/07/21.

At the eastern end of the shed is three silos. All the associated augers and pipe work is now gone but some of it remains on the ground near the silos.

Clarks Mill Flour Store including the three silos on the eastern side. 09/07/21.

The railway siding alongside the Flour Store. 09/07/21.

Along the north side of the flour store is the railway siding. Its here that the remains of loop exist. The siding itself curves around the north side of the store allowing access to two sliding doors that allowed wagons to be loaded directly from the store.


Concrete work on the railway siding beside the silos at the eastern end of the flour store. 09/07/21.

Concrete work can be seen between the silos and the railway siding. I'm not sure what this concrete work was for but parts of an auger lay nearby that was possibly used to load grain into or unload grain from wagons.

The old mill building to the east of the flour store with the railway siding at the centre. 09/07/21.

To the east of the flour store is the old mill building. This building is a combination of a corrugated iron store and a four storey building built to a Scottish design using locally quarried lime stone.

The old mill building. 09/07/21.

Along the north side of the old mill building is a concrete water race where diverted water from Mill Stream was channeled to a large water wheel to drive the milling machinery and millstones. 

The concrete water race coming from Mill Stream. 09/07/21.

The water race leading to the mill. 09/07/21.

The timber water race along the north side of the old mill building. 09/07/21.

A detail shot of the timber water race along the north side of the old mill building. 09/07/21.

A detail shot of the timber water race along the north side of the old mill building. 09/07/21.

A detail shot of the timber water race along the north side of the old mill building. 09/07/21.

Returning to the south side of the building you can see the end of the railway siding which is alongside the south side of the mill building.

Western end of the old mill building. 09/07/21.

Southern side of the old mill building. 09/07/21.

Southern side of the old mill building. 09/07/21.

The siding loop ends at the old mill building and the loop points and trackwork remain in place.

The eastern end of the siding loop. 09/07/21.

The siding loop point leading to the old mill and the end of the siding. 09/07/21.

A points lever has been placed beside the loop point but is not connected to the points. Looking at the photo of the Bren Gun Carrier earlier in this post it isn't the same one. While not the original lever for the siding it's still a good find with its cast lever weight having NZR 1882 on it.

The point lever for the loop points at the old mill. 09/07/21.

Just to the east of the points sits an old La class 4 wheel high side wagon. These wagons would have been a common sight on this siding loaded up with bagged grain. This wagon has been refurbished and has the number LA 1360 stenciled on the frame.

Four wheel high side wagon LA 1360 at Clarks Mill. 09/07/21.

Side on view of LA 1360. 09/07/21.

End view of LA 1360. 09/07/21.

Detail shot of the suspension, bearings and wheel on LA 1360. 09/07/21.

Just to the side of the wagon is a lean to shelter and a door where grain and flour was loaded into wagons. The lean to shelter is also where the siding ends. 

The lean to shelter and end of the siding at the old mill building. 09/07/21.

End of the line. The end of the siding beneath the lean to shelter. 09/07/21.

Off to the side of the old mill building is a weatherworn timber office and store. This building has seen better days.

Old office and store. 09/07/21.

Having to get back on the road I was able to have a quick look at the millers residence and cottage on the site. These buildings have been well looked after and provide some good examples of North Otago building construction when timber was in short supply but there was plenty of lime stone available. 

The millers residence and cottage. 09/07/21.

The mill is open for visitors between September and May on Thursdays 10:30am to 1pm and on Sundays 1pm to 3pm. Costs are $10 for adults, $5 for tertiary students and children are free. 

The mill machinery runs on the last Sunday of the month. The cost for adults increases to $15  when the machinery is operating. 

Well done to Pouhere Taonga Heritage New Zealand and the local volunteers that maintain this site and keep New Zealand's early industrial history alive for future generations. I for one will be back in the summer to see the mill in operation.

If you want to know more about Clarks Mill please visit the Pouhere Taonga Heritage New Zealand's Clark Mill page.

And that's about it.


Monday, April 12, 2021

Light at the end of the Tunnel - Rakis Tunnel on the Tokarahi Branch


Interior of the Rakis Tunnel.

Returning from a work trip up the Waitaki Valley I decided to take a short detour to explore the Rakis Tunnel. 

The Rakis Tunnel is one of two tunnels on the former Tokarahi Branch. The Tokarahi Branch left the Ngapara Branch at Windsor. Construction of the 19.22 branch started in June 1879 and was opened for traffic in July 1887. The branch had a short life and closed in July 1930. 

Above the tunnel is the significant flat top feature called the Rakis Table. The Rakis Table is made of Raki Siltstone deposited around 42 million years ago when this area was underwater. The tunnel is named after this feature.

The tunnel is about 100 metres long with a curve in the middle so there is very little light in the middle of the tunnel. I would highly recommend bringing a torch or head lamp.

Rakis Tunnel is easily accessible and is now part of the Alps to Ocean Cycle Trail.

If you don't want to bike the over 300 km's from Aoraki Mount Cook Village to Oamaru to visit the tunnel you can drive to the carpark located on Tunnel Road. The carpark is marked by an Alps to Ocean Cycle Trail sign.


Alps to Ocean Cycle Trail sign at the carpark on Tunnel Road.

From the carpark you walk down to the former Tokarahi Branch right of way and follow this about 150 metres to the western portal of the Rakis Tunnel.


The Alps to Ocean Cycle Trail leading to the western portal of the Rakis Tunnel.

Approach to the western portal of the Rakis Tunnel.


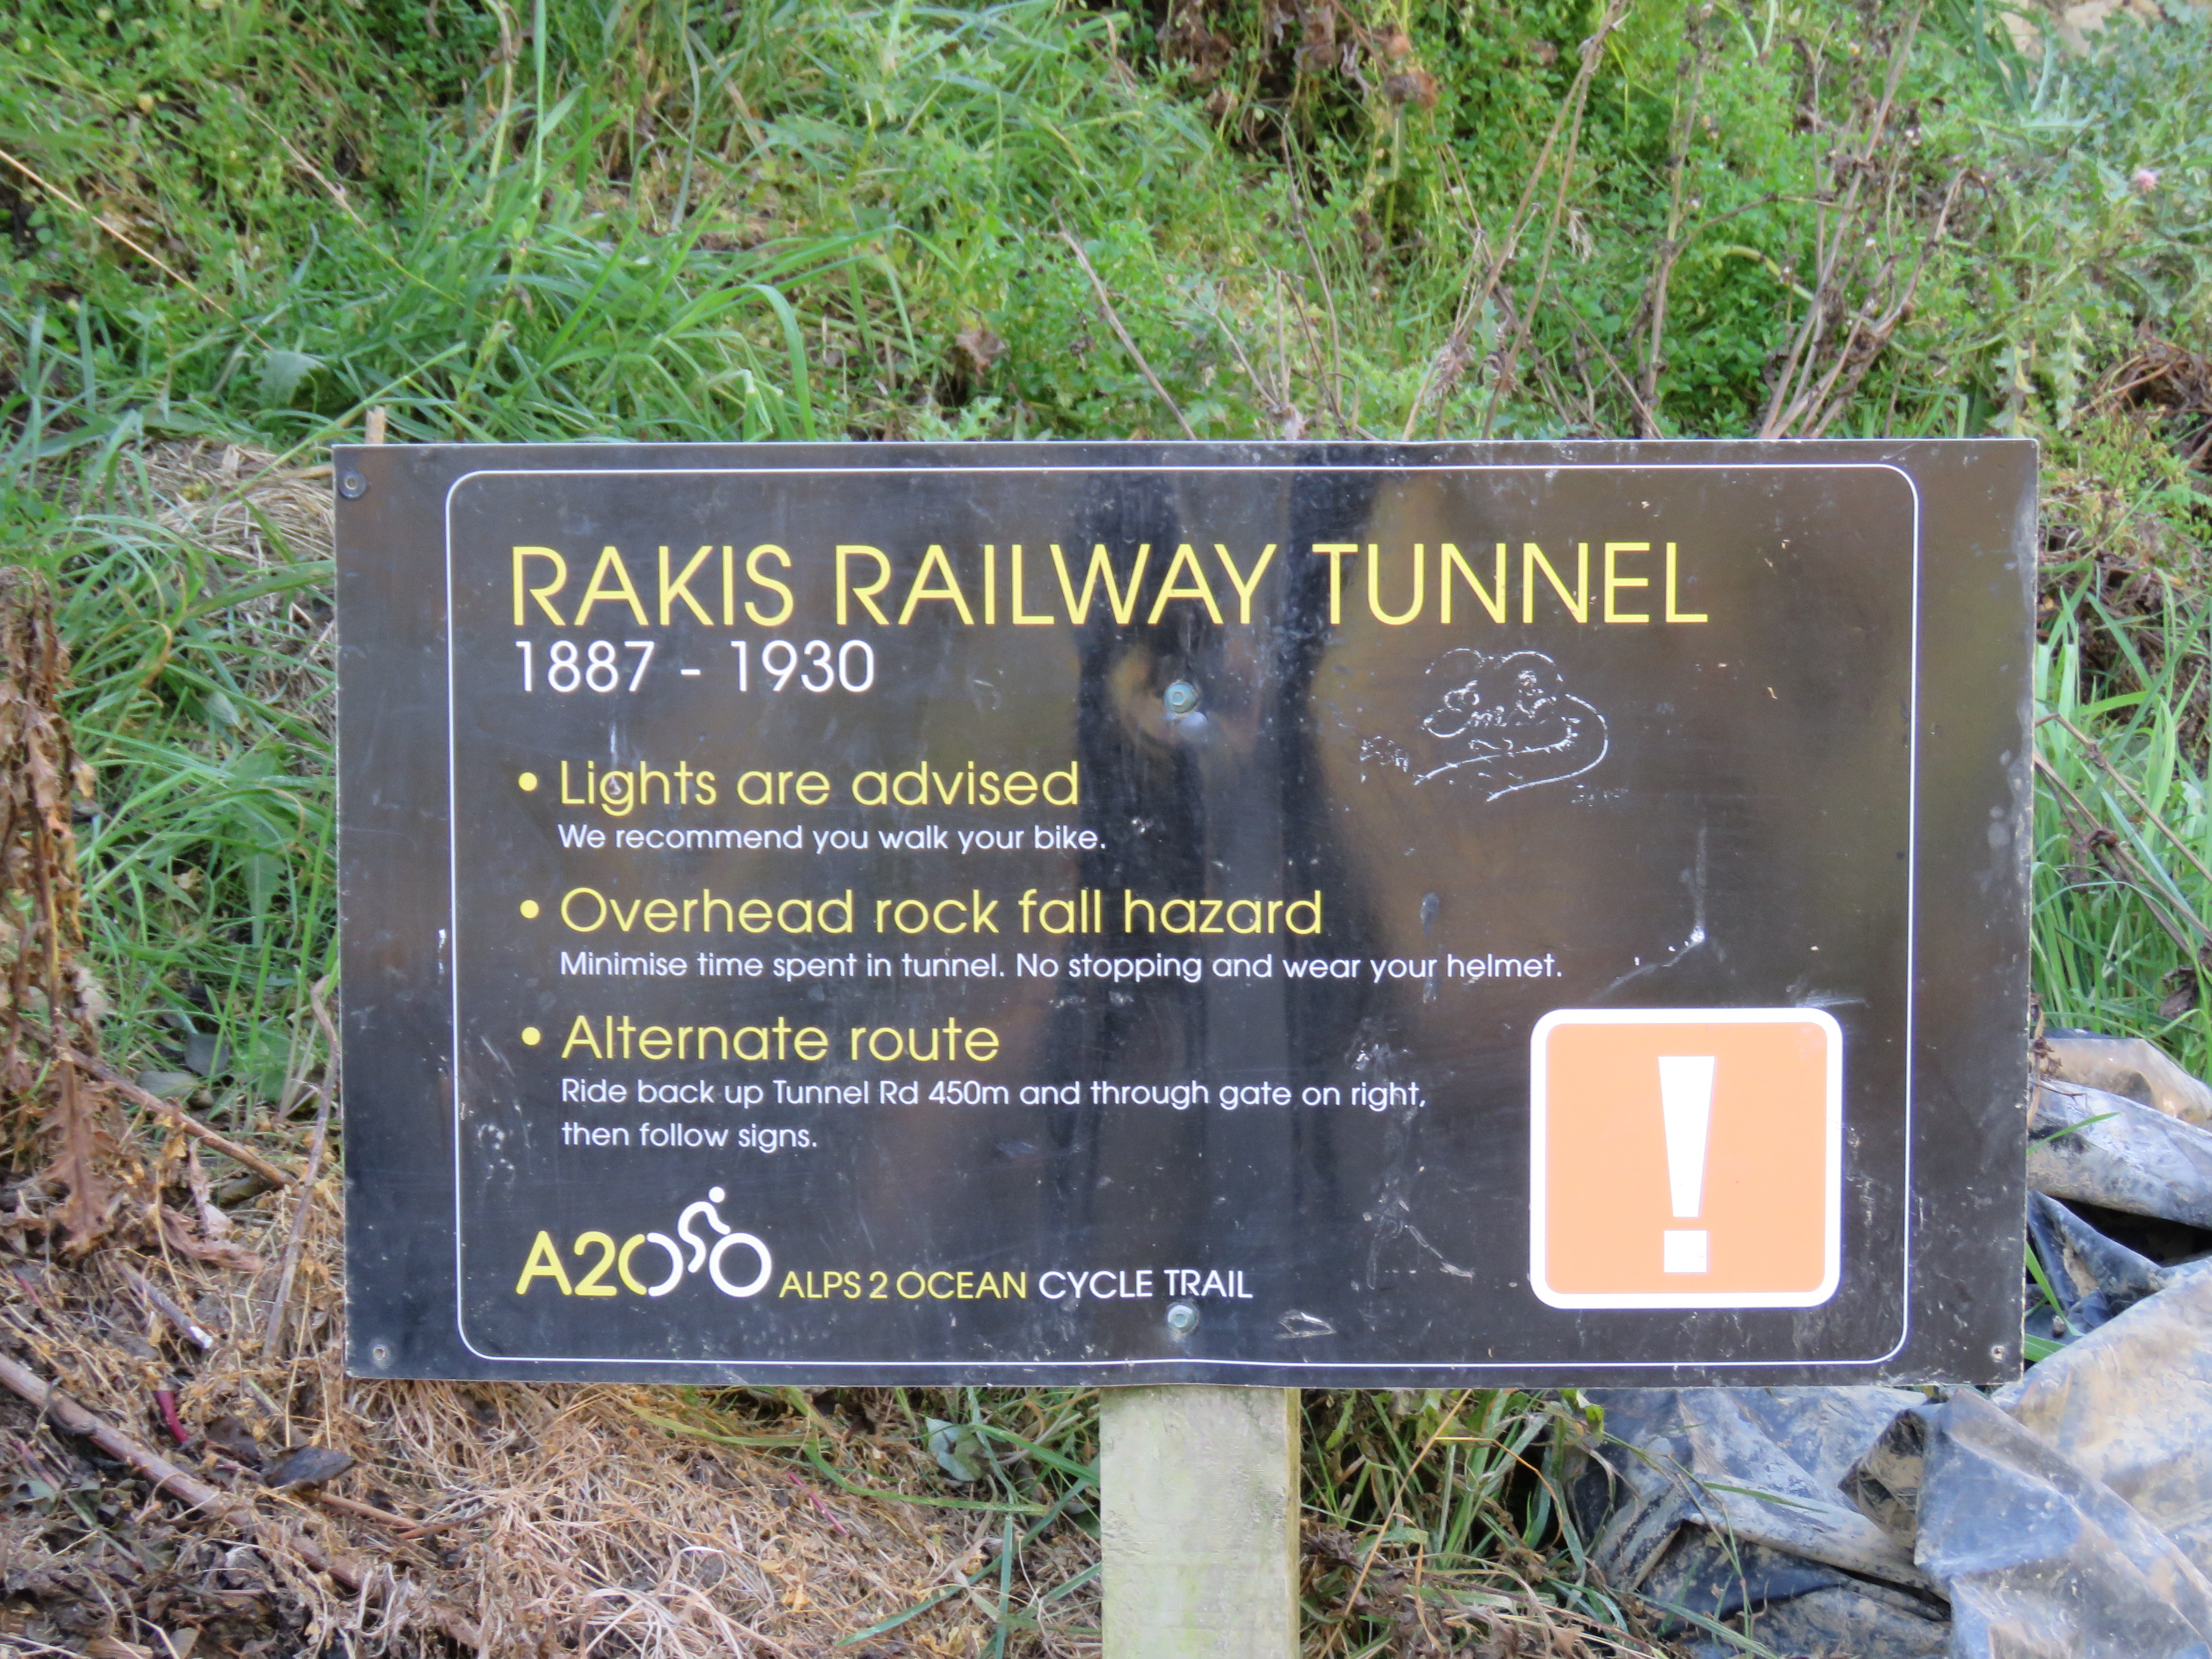
At the western portal is a small Alps to Ocean sign with the name of the railway tunnel, its years of service and due to the nature of the tunnel that lights are recommended and that there is an overhead rock fall hazard.

                            A2O sign at the western portal of the Rakis Tunnel.

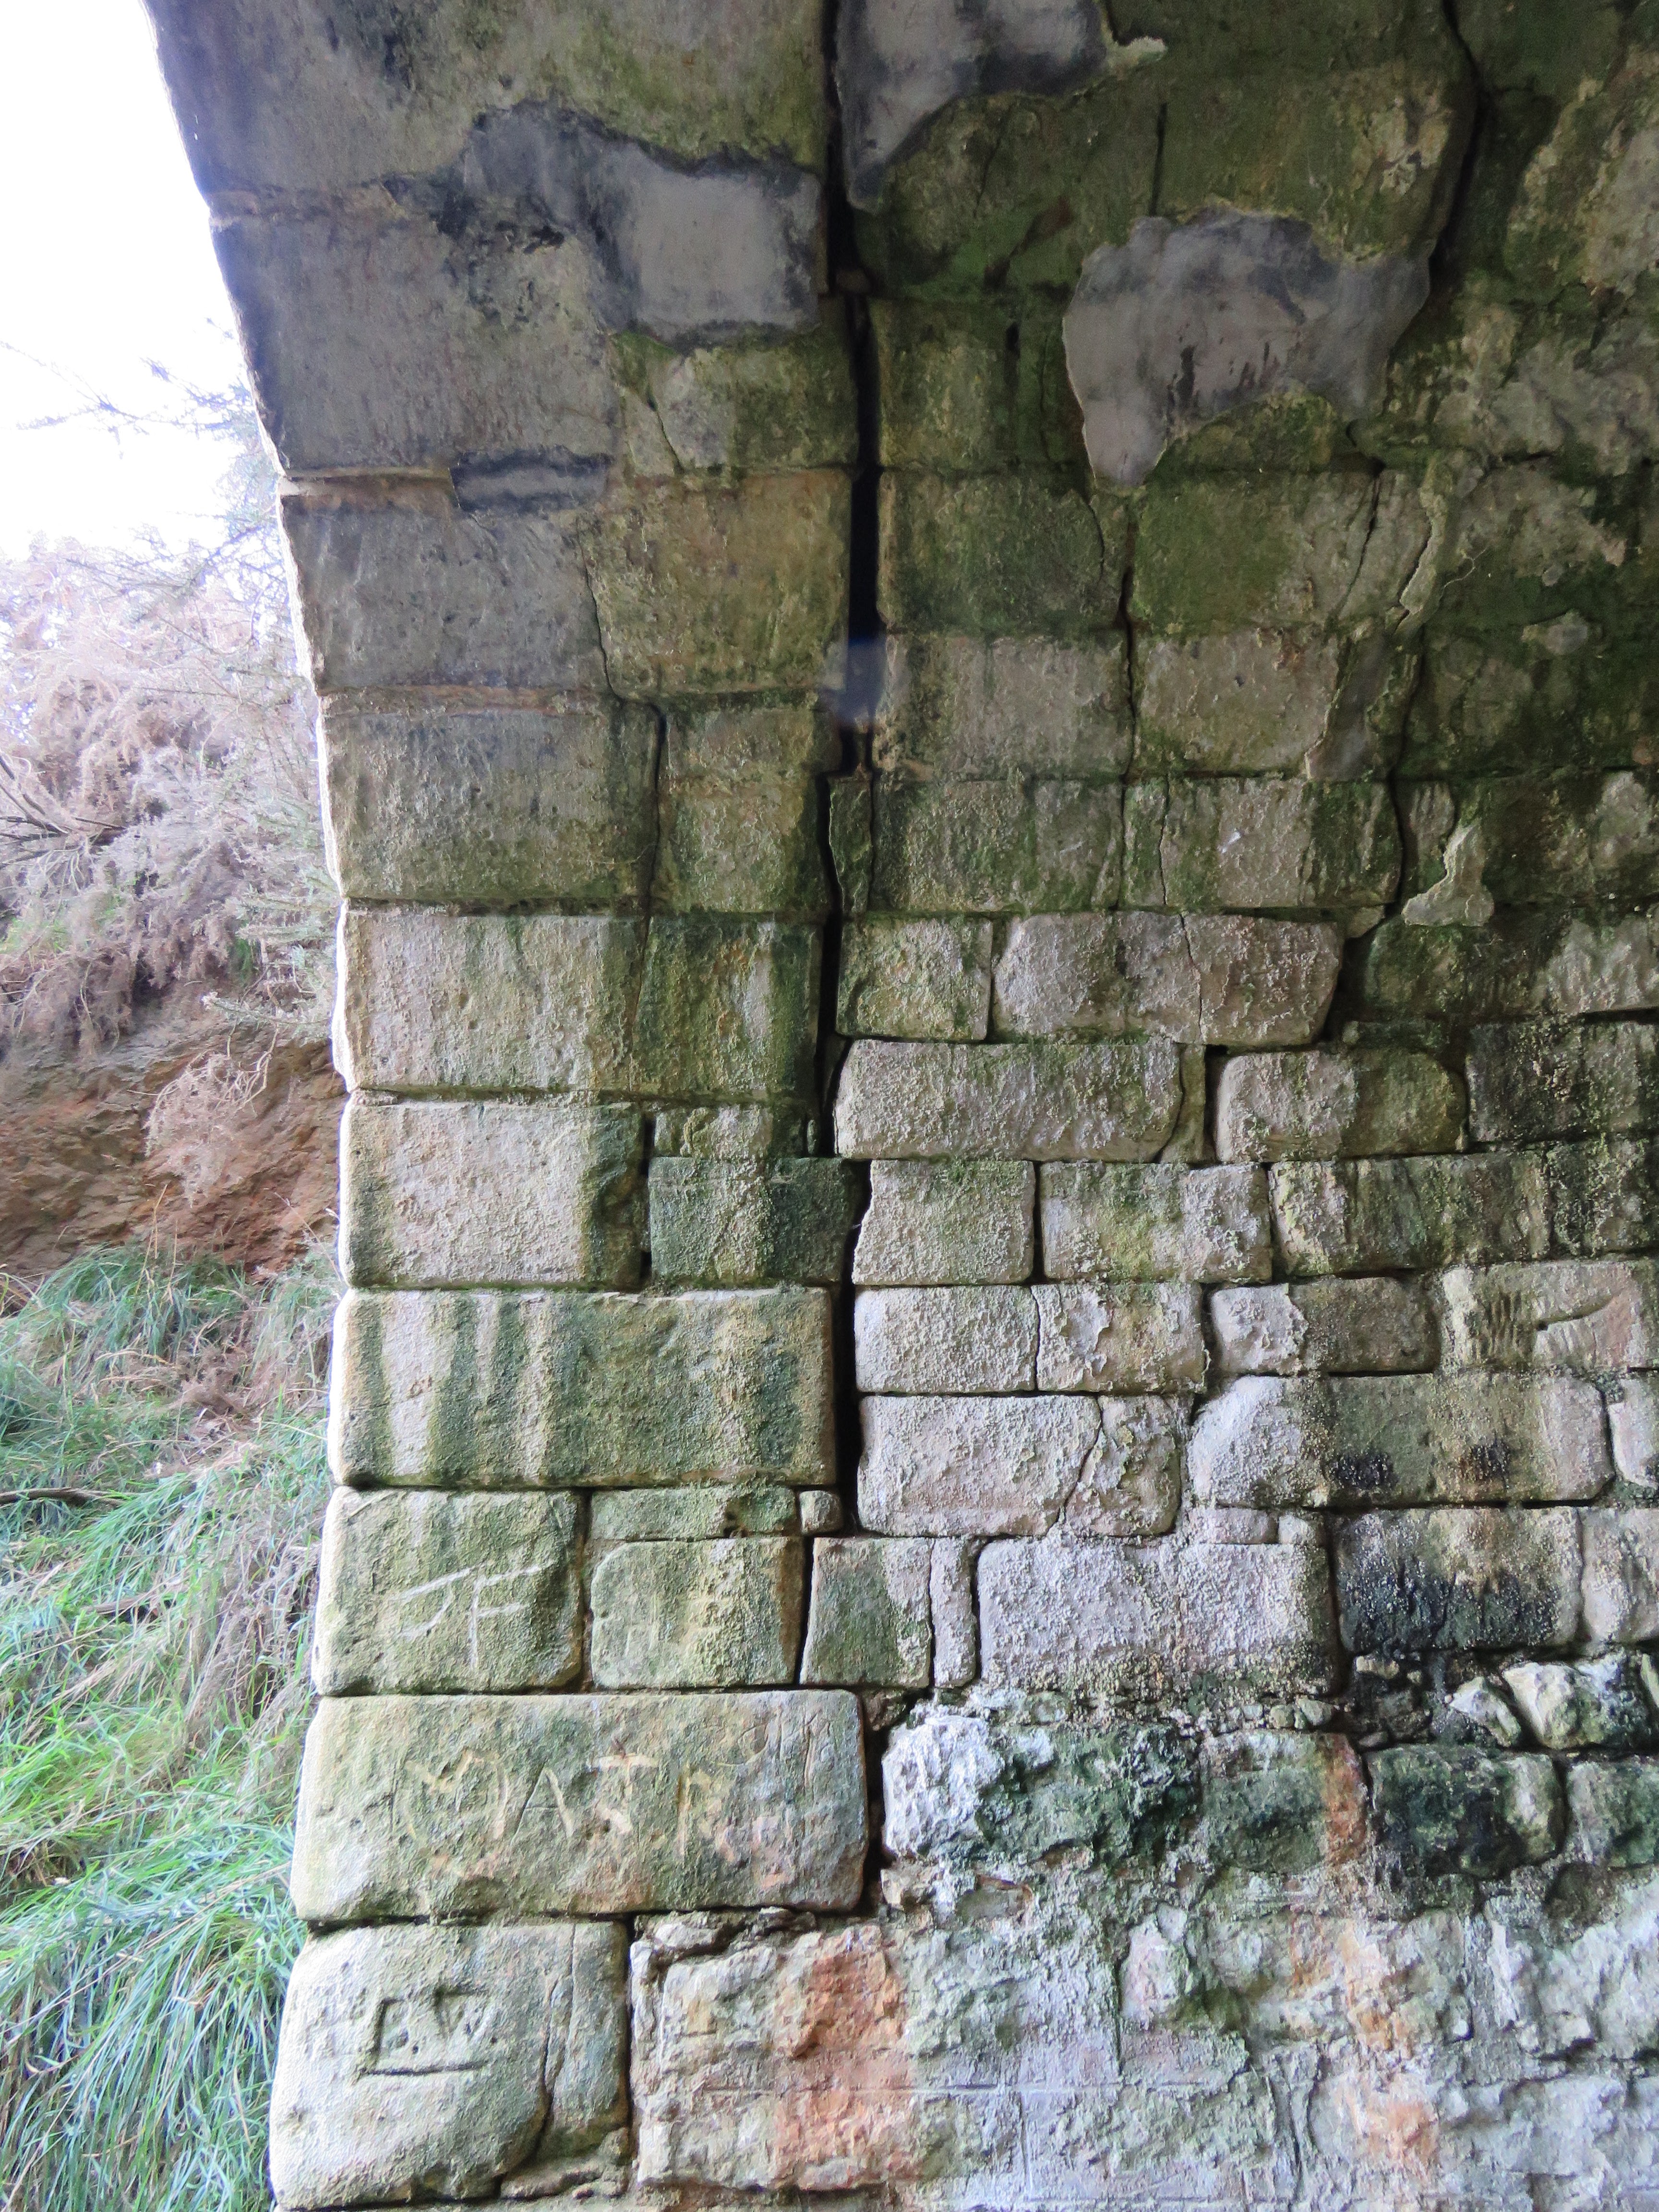
Both portals of the tunnel are constructed of local sand stone.

Western portal of the Rakis Tunnel.


Detail shot of the western portal of the tunnel.

The western end of the portal is very wet with water leaking down through the ceiling of the tunnel and water coming in from outside the portal. Evidence of the water leaks can be seen on the walls of the tunnel especially on the northern side. 


The wet floor and walls at the western end of the tunnel.

While there has been some work done to assist with drainage the constant water leaks make the surface of the tunnel at the western end very slippery and not great for cycling on. I would highly recommend that any cyclist walk through the tunnel to avoid falls.

After passing the wet area at the western end of the tunnel the tunnel floor firms up and is free of water.

Internal detail of the tunnel walls and ceiling.

At about the middle of the tunnel is a niche built into the northern side. railsystem.net defines a niche as 'an area / adit off the main tunnel used for emergency supplies'. I'm not sure the tunnel is quite long enough that it required emergency supplies but was probably constructed for workers to quickly move out of the if caught in the tunnel when a train approached.


The recess in the northern side of the tunnel.

From the niche the tunnel straightens and the eastern portal comes into view.

View looking out from the eastern portal.

As you walk through the eastern portal of the tunnel you can see the brick work of the portal and how it is connected to the tunnel's brick lining.

Brick work at the eastern portal.

On walking outside the eastern portal is of the same sand stone construction as the western portal. Of the two portals this would be in the best condition of the two.

Detail shot of the eastern portal.

From the eastern end of the Rakis tunnel the Alps to Ocean Cycle Trail continues east using the former Tokarahi Branch right of way and parts of the Ngapara Branch as it weaves through North Otago on its way to Oamaru.

Eastern portal of the Rakis Tunnel.

So if you enjoy looking at old branch railway infrastructure, you're in North Otago and can spare an hour or two I would highly recommend a visit to the Rakis Tunnel.

And that's about it.


Monday, February 22, 2021

Home, Sweet Home... for a new layout hopefully.

So I've been thinking about my small HO scale Victorian Railways switching layout that is set up in my garage. The garage is underneath our house and really isn't suitable for a layout. The main issue is the dust. Most of the garage is unlined and since the house is built on a slope some areas under the house are exposed dirt. Dust and fine dirt can be blown around especially when the kids leave the side door open after they drop their bikes on the floor. First world Dad problems. In short the location is not ideal for a layout especially when your layout is DCC with its electronics, decoders and throttles.

We've reached a stage where we're pretty settled and the time is right to build something to house a layout and all my railway 'stuff'. Its amazing what you pick up and collect, not just locomotives, rolling stock and kits but books, magazines and memorabilia. I'd hate to add up the cost of all this stuff and I haven't even tried because I don't want to know! Honestly I should just for insurance purposes. 

So I've decided to move my railway stuff from the garage to a purpose built building. Over the past few months I've been spending a lot of time online looking at cabin, hut and shed designs to see what would best suit my needs. 

I looked at getting a 20 foot container. Containers are very popular because they provide good storage at a good price. They're sturdy, transportable and if you get one in good condition they're weather proof. You only have to look around to see how popular they are. They're literally everywhere.


Where I live in Otago we get a pretty big variance in temperatures through the seasons, from cold nights and morning frosts with single digit day time highs in winter to dry hot summer days in the 30's. While the steel construction of containers make them robust, the same metal construction allows for very efficient thermal conduction as well. This makes the inside very, very hot in the summer and very cold in the winter. Not great on track or electronics. Sprayed foam insulation would help but is expensive. 

The next option I looked at was metal garden sheds. These are also cost effective but suffer the same sort of issues as containers and they're not as robust. 

Kit set garages are popular for hobby spaces but are beyond my budget.

I've settled on making my own hut / shed. Now I'm not a builder by any means but I like the idea of building my own space. An added bonus will be that I pick up some new carpentry skills and a few power tools along the way. 

Since the hut / shed would be used for a small staging to station point to point layout and as a place to store and show my memorabilia I thought a railway design would be appropriate. With the section we have size won't be an issue but it needs to be something manageable.

Searching the net I found a few plans that would work for me.


Victorian Railways 10' x 8' Hut

The first was a Victorian Railways 10' x 8' way and works portable hut.

 
Credit: Mark Beau victorianrailways.net

I found this plan on Mark Beau's excellent Victorian Railways website 
 www.victorianrailways.net . If you're a fan of Australian railways you'll love this website. I cannot recommend it highly enough.

This plan rates highly because it has that link back to what I model and with beefed up framing would be a great looking little hut.


NZR 14' x 9' Shelter Shed 

The second plan I found was for an NZR 14 x 9 foot shelter shed station. These station shelters were found at small unmanned stations throughout New Zealand.

Da 1512 leads a goods train with car past the shelter shed at Ngapuhi on the Okaihau Branch in the far north. Credit: Internationalsteam.co.uk 

I found this plan on archway, an online search tool from Archives New Zealand. 

Credit: Archives New Zealand - Archway

I've spent many hours searching through archway. Most of the building plans are held at the archive offices in Auckland, Wellington, Christchurch and Dunedin but many are held in digital form and can be downloaded for free. 

You can access archway at https://www.archway.archives.govt.nz/ 

At 4.2 meters long by 2.7 meters wide this building is quite a bit bigger than the other huts and sheds I've looked at. While the extra space would be nice the extra materials required will stretch the budget but the mono pitch roof will also make it easier for me to build.


NZR One Man Hut

The third plan I'm looking at and the front runner at the moment is a plan I found in the Archives New Zealand office in Dunedin for a proposed 7' 6" x 10' 6" one man hut. 


Credit: Archives New Zealand - Dunedin Office

While this plan is described as a proposal it actually became the basis for a new design of single men's huts on the NZR. These huts were found all around New Zealand and sometimes in quite large numbers as shown in the photo below from the Te Ara - Encyclopedia of New Zealand website showing the single men's compound at Gracefield in the Hutt Valley.

Single Men's Compound at Gracefield, Hutt Valley. Credit: Te Ara Encyclopedia of New Zealand https://teara.govt.nz/en/photograph/21417/single-mens-huts-gracefield

A single man's hut on a wagon at the Palmerston North railway yards. Credit: Manawatu Heritage https://manawatuheritage.pncc.govt.nz/item/59bcd750-b6a8-4a3a-903b-bd456bb486f5 . 


So those are the three options that I'm looking at. If you have any advice, it will be gratefully  received.

Hopefully I'll have a design picked in the not to distant future and an upcoming post will cover the preparation and construction.

And that's about it.